New Goat Barn

This post has been on my to-do list for a couple of months now, but with all the spring babies and home projects, I couldn’t find the time. Spring/summer is such a busy time around here, so we are already counting down until winter when the cold seems to slow everything down.
At the start of spring, I realized I wasn’t going to be able to sell all the new goats because I was already too attached. That meant I needed to build a new goat barn if I wanted to keep them. Anyone who knows me knows that I never do the easy thing, so simply throwing together a little structure wasn’t in the cards. Instead, I decided to build a massive goat barn. I figured I could use it as a now for the boys or use it years from now as a tool shed. And just like with this blog post, I dragged my feet on building it. The project just seemed so overwhelming, and I'm not sure why. It could be that I have zero experience framing, or that I was feeling like being lazy, but for whatever reason, I kept putting it off.

Like with all my projects, I started by sketching a little drawing and making my cut list for my next home depot, after spending hours googling ideas. I designed the barn to be 8’x8’x8’ using a double-stacked header on one side to allow drainage on the roof, and a little venting on the side. This does differ slightly from my drawing, but that's just how these things go in my world. A big bonus to this size was that I didn’t need to do that much cutting, eight foot is the exact size the 2x4’s come in. I don’t know if I’ve mentioned this before, but I’m afraid of the circular saw. I don’t mind the miter or table saw, but the circular saw has always terrified me, and it’s the only saw I had access to that far out in the pasture.


I started by framing out three of the walls putting a stud every 24 inches, I'm not sure what the code is on this type of structure, but that spacing worked out the best mathematically, so I went with it. Each wall took seven full 2x4x8 studs, five evenly spaced pieces screwed into two vertical studs with deck screws. I made sure everything was squared off before screwing all the pieces together, I should have screwed smaller cross pieces at this point for more stability, but hindsight is 20/20. I’m pretty proud of myself for this next part since I was all by myself, and the walls were massive, I used a nearby tree to support one wall, and then I screwed the other two walls up. I’m still not sure how I accomplished it without help, but I did. I waited to build the front wall until last because I had planned on putting a giant dutch door in, so the framing would need to be slightly different to account for it. I added studs every 24 inches like the other walls, but I left the center stud out to leave room for my future door.

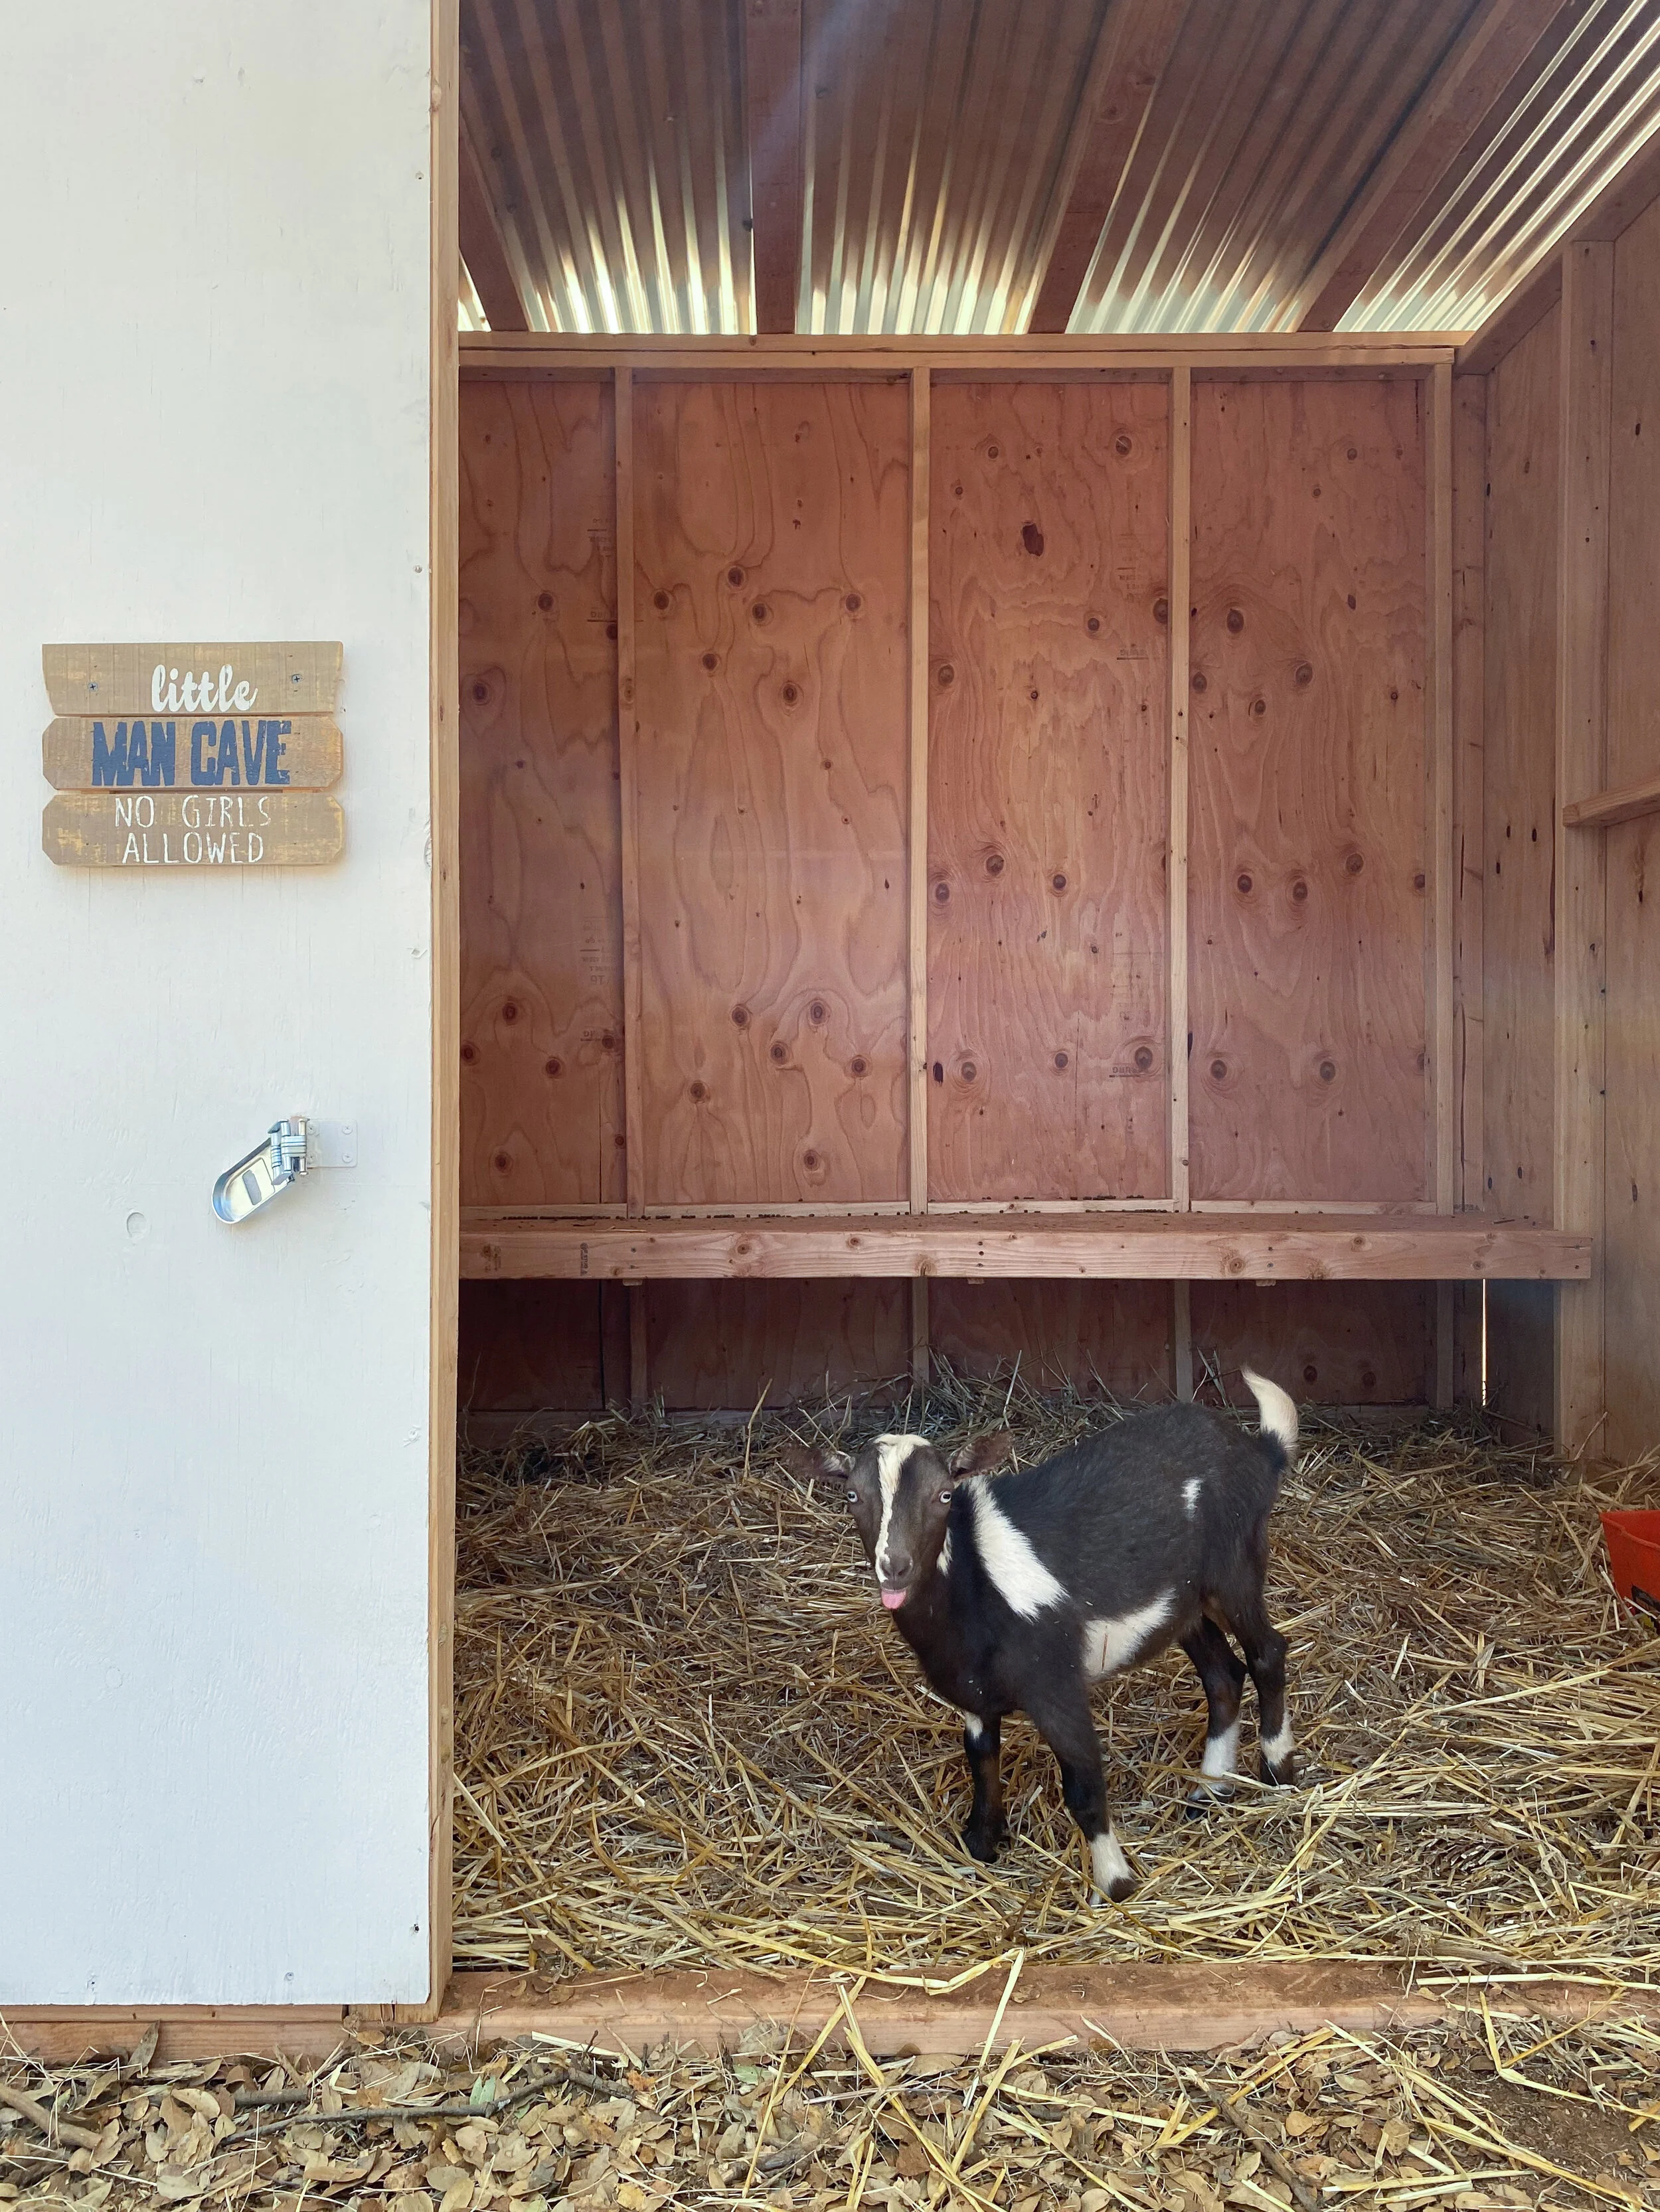
At this point, I realized it wasn't very stable, and it could be rocked back and forth with just a slight push. I knew it was time to phone a friend, so I called my husband. He explained that I needed to put cross supports on the inside to help me stabilize everything. Once all the supports were added, and I called my kids out to help me with the exterior siding, it finally felt stable. The next day I started on the roof rafters, a single 2x4x10 wood stud was screwed into the back wall, and two more were stacked and screwed on the front wall to create a slope. If I lived in a place that got more severe weather, I would need a much steeper slope, but for my location, this was fine. Six 2x4x10 wood studs were then added to the roof in the opposite direction to hold the corrugated roof panels. I spaced them evenly across the top, but you need to make sure they are not wider than whatever roof panels you choose to use.


I forgot to mention that I did all this roof work with a lighting storm rolling in. The sky looked incredible while I was up there, and it also happened to lead to one of my favorite memories on the farm to date. My husband came home while I was working on the barn and asked me if I needed his help, and I did of course, but I needed him to finish the plumbing in our laundry room more, so I said no. I hoisted each sheet of corrugated metal up on the roof alone and then screwed it in before working on the next panel. I worked hard and fast trying to beat the storm because I didn’t think working with large sheets of metal in a lightning storm was a great idea. I probably should have waited for better weather, but it needed to be watertight before the storm hit, and I didn't want to wasted time with plastic wrapping it or moving all my tools to safety. When I tried to start on the last sheet of roofing, and I couldn’t get my ladder stable enough to climb up without a spotter, I had to call in my husband for help. He came out to help but was yelling at me because he hadn’t realized how close the storm had gotten. The thunder in the sky was beating down on us, and the wind had kicked up like crazy blowing everything around. After a little back and forth over who was going up on the roof, I won, and he held the ladder grumbling about stubborn crazy women. I quickly screwed everything in, and right as I put the last screw in, the sky opened up like it had been waiting for me. I climbed down quickly, my husband grabbed my hand, and we ran through the fields to safety laughing. I swear it felt like something out of a movie, crazy and stupid for sure, but at the time it felt magical.

While it was raining, I built the dutch door in our greenhouse, and then I went back out to do the finish work a couple of days later when everything had dried. I cut a hole in the siding with my jigsaw to add an old window someone had given me. I put a little bench inside for the goats to lay on when the ground got wet. I painted the whole thing a white with green trim (an exterior paint I had picked up cheap in the oops paint section of home depot) and added all the finishing touches. Then it was time to let the little bucks enjoy all my hard work.